Showing posts with label GCACW. Show all posts

Sunday, February 23, 2020

Great Campaigns of the American Civil War "All Green Alike"

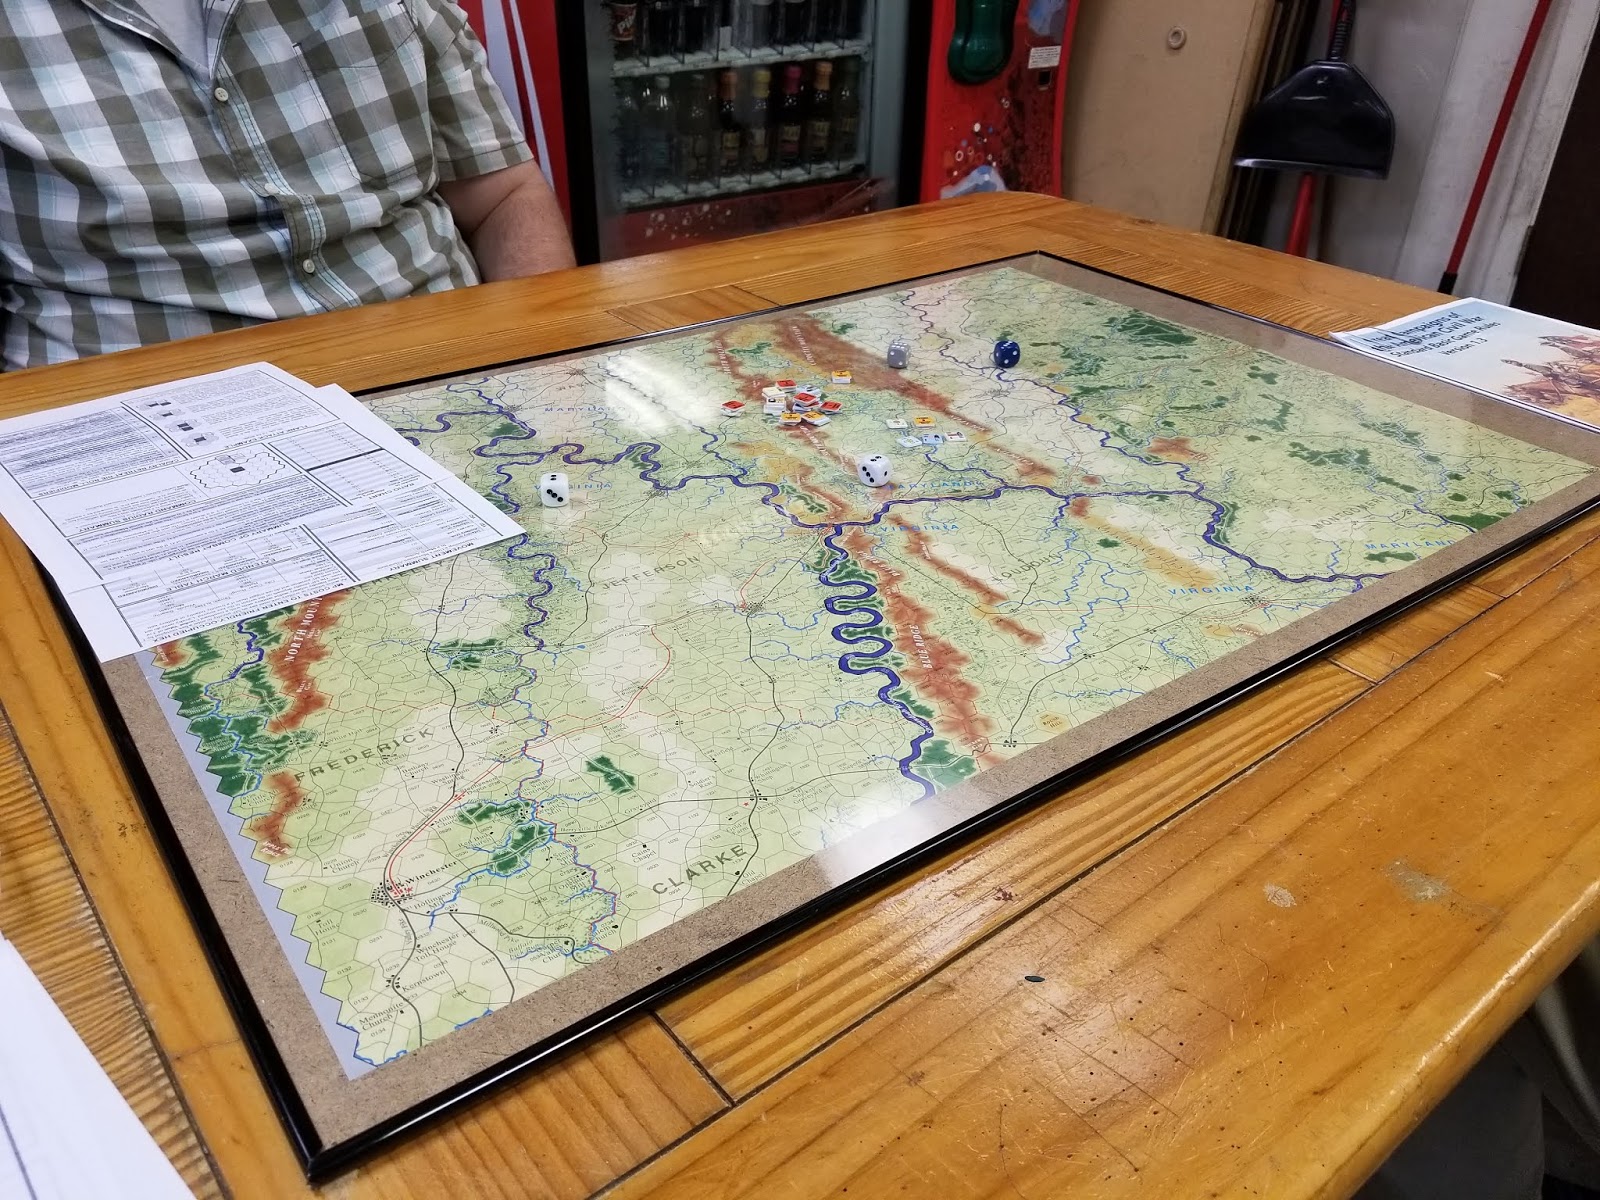
Saturday, February 22 was the opening day of our epic multi-player format version of the full Virginia Campaign from "All Green Alike." This module is found in MMP's Stonewall Jackson's Way II. Six players faced off in this 14 day scenario utilizing the two maps from SJWII and the west map from Here Come the Rebels. The situation presented is the opening campaign of the American Civil War in July 1861. Two Union armies face off against their corresponding Confederate counterparts in nearby Virginia theaters. One set of opponents face off outside the gates of Washington D.C., while the others maneuver in the Shenandoah Valley. Each side faces an interesting set of decisions as to how to accomplish their goals. 

The Virginia Campaign - July 1861

We completed the first four days of the campaign from July 15 to 18. In the Valley, Patterson's Federals and J.E. Johnston's Rebels quickly and deliberately marched for each other along Mill Creek. Each side launched attacks where local advantages were found, but the end result was stalemate along the line. 

Stalemate in the Valley

McDowell's Union Army of Virginia marched on the direct road toward Bull Run. P.G.T. Beauregard's Confederates contested this advance with a series of sharp battles in a fighting withdrawal. General Keyes' Union command was routed while "Shank" Evens' brigade was obliterated in a massive Union counter-attack. The situation in this sector remains fluid and undecided. 

Union Advance on Bull Run

Saturday, September 22, 2018

GCACW Demo Weekend

Last Saturday I conducted a demo of the Great Campaigns of the American Civil War at our own FLGS Games Plus in Mount Prospect, Illinois.  Thanks to the recently created Wargamer Opponent Finder on Facebook I was able to organize this event with two newcomers to the system.  There is a new google map for players searching for games which I have linked on the sidebar similar to the ASL Opponent Finder.  At the demo I taught the new players the South Mountain scenario from Roads To Gettysburg II.  I hope to run more of these in the future for those interested.

Saturday, December 21, 2013

Stonewall Jackson's Way II: AGA Scenario II: Johnston Vs. Patterson

As much as the first scenario of "All Green Alike" presented a straightforward situation, the second scenario offers a far more complex series of decisions and victory conditions that belies its small scope.  "Johnston Vs. Patterson" recreates the situation of July 1861 when Gen. Johnston slipped away with his Confederate Army to reinforce Gen. Beauregard and tip the scales to a Southern victory at 1st Bull Run.  The is the only other scenario except for the previously reviewed Scenario 1 and the full Virginia campaign that will use the west map from "Here Come The Rebels."  The game is 3 turns long and musters roughly 5 brigades for the South and 8 for the North.

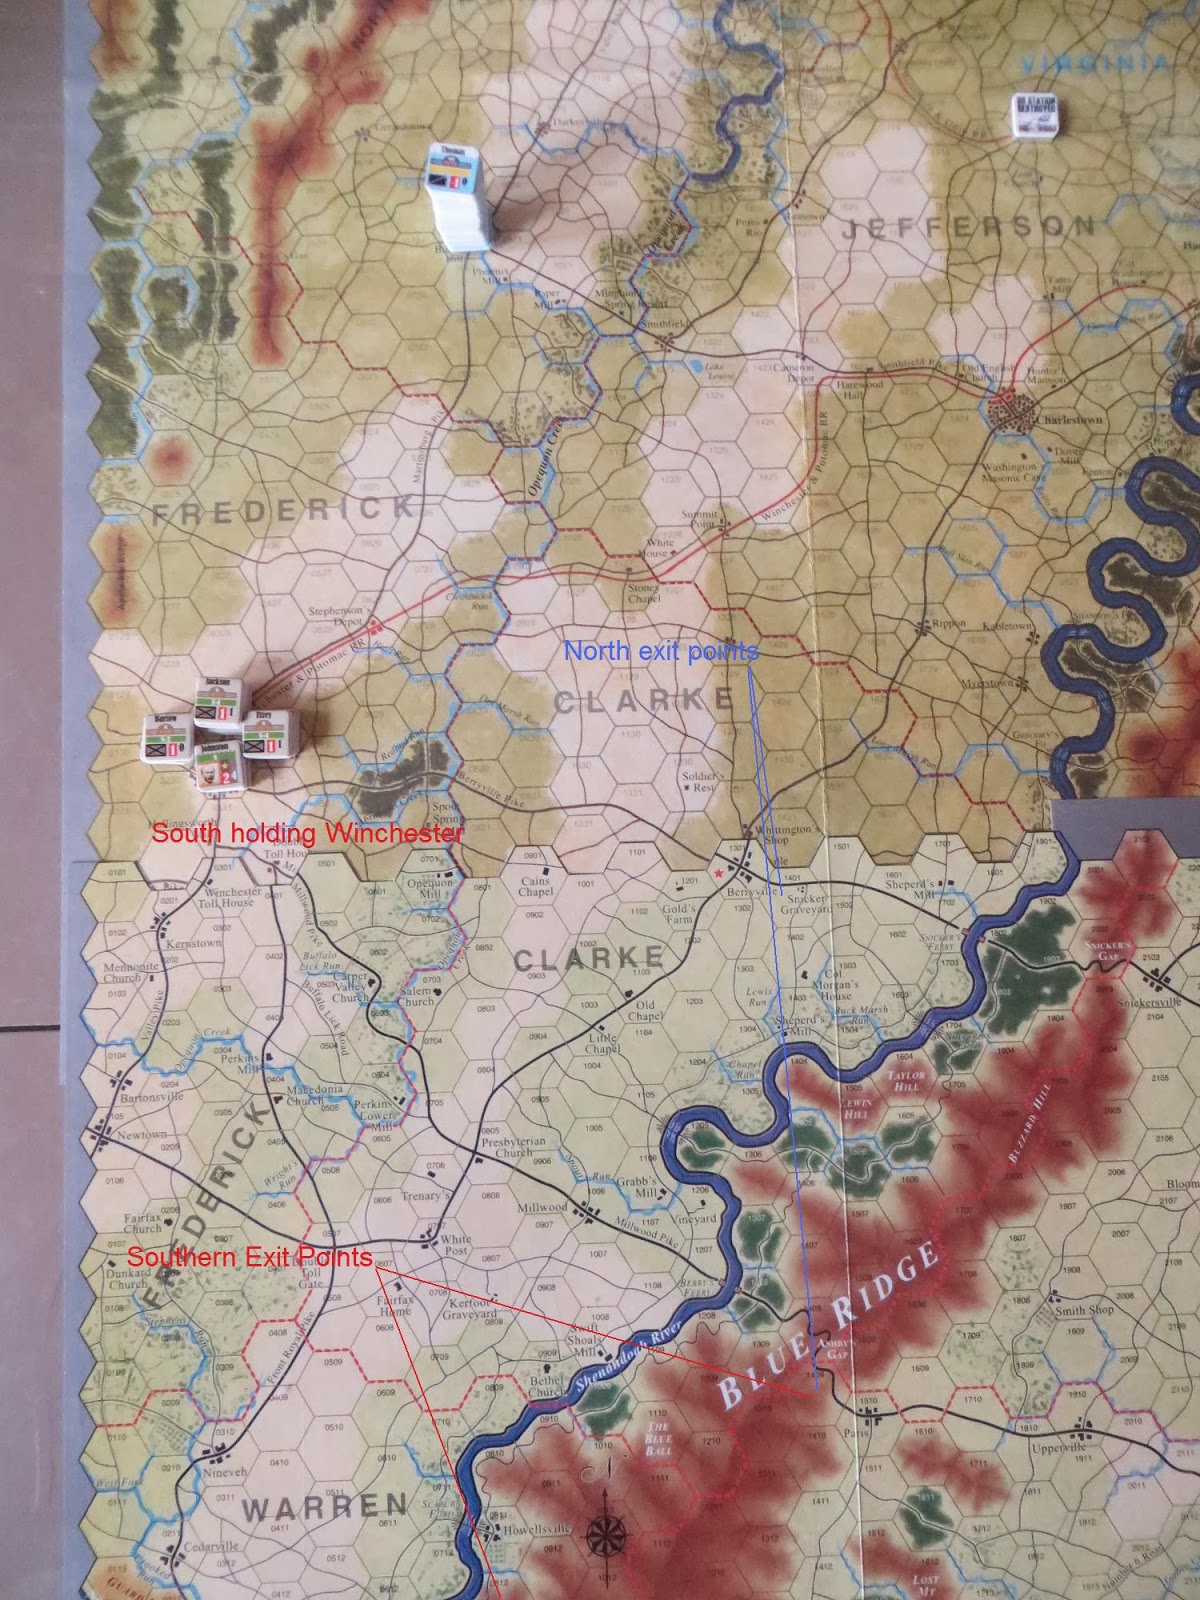
The Confederates are tasked with exiting the map, defending Winchester and attacking the Union army with the goal of creating panic.  The North achieves its objectives by also exiting the map, preventing the South from exiting, taking Winchester and causing the Confederates to panic.  Panic is a new game mechanic added to "All Green Alike", a far more comprehensive rule than the relatively simple concept of panic that was found in the original "Stonewall Jackson's Way."  Each army in the game is given a panic level.  Once enough units in the given army take retreat or rout results in combat the whole army may panic.  A panicked army suffers various effects, most notably a -1 modifier to all combats as attacker or defender for the rest of the game.  Each side has to carefully pick its objectives while planning both offensive and defensive possibilities, all under the fast moving 3 day time limit.  Be sure to read the victory conditions carefully.  On our first playthrough I failed as the South to account for the fact that all 5 brigades must exit the map or face a VP penalty.  That mistake cost me the game by a very narrow margin.
Johnston Vs. Patterson Setup

Thursday, December 5, 2013

Stonewall Jackson's Way II: AGA Scenario 1: Across the Potomac

The first scenario from SJWII's "All Green Alike" focuses on the overlooked pre-Bull Run campaign in the Shenandoah Valley.  The game takes place from July 2-5, 1861 as Gen. Patterson leads the first major Northern invasion of the region.  The historical dates for this scenario are the earliest represented in the GCACW and even fall before the dates set for the AGA advanced games, making this scenario the unique starting point for the whole war.  This scenario does take place exclusively on the "Here Come The Rebels" west map, so ownership of that game is required to play.

This scenario provides an excellent introduction to the game system with low counter density and a simple set of victory conditions.  The Southern force contains 4 infantry brigades vs. the North's 6 brigades.  The Union objective is to secure a series of locations, the deeper into enemy territory they go the higher the overall VP reward. This sets up a nicely balanced meeting engagement as the Confederates move north to stop the incursion and take back objectives.  All the "green" restrictions are in play here as leaders have a limited ability to command troops to march and attack.
Across The Potomac Setup

Thursday, September 19, 2013

Stonewall Jackson's Way II

At long last the newest entry in the GCACW has arrived: Stonewall Jackson's Way II.  It is unfortunate that MMP decided to market this game as SJW 2.0 because the box contains so much more than the original.  It provides two complete modules sharing one map set.  The "All Green Alike" module features scenarios and campaigns from the July 1861 1st Bull Run period, while "Stonewall Jackson's Way" contains those actions from the 2nd Bull Run campaign of 1862.  A more appropriate title for the game should have been something in the vein of "Stonewall Finds His Way to Bull Run - Twice!"   Well, perhaps something a little snappier, but you get idea.  With over 2x the content of the original game a little rebranding might have been in order.

The components use the new standard design established with MMP in "Battle Above the Clouds."   The manpower counters included now go up to 18 making it now possible to use the new informational counters in most of the older games.  The map is another GCACW wonder, with very crisp detail and lighter hues making it much easier to read than some of the older maps.  The maps have been completely updated to the standard rules, incorporating new terrain features such as hills and ferries.

The "All Green Alike" module contains 5 scenarios and 2 modules from the 1861 early war period.  The units here are all appropriately "green" with leadership values ranging from 1 to -1.  Even the mighty Stonewall himself rates only a 1.  It should be noted that two of the scenarios and one of the campaigns require the use of the west map from "Here Come the Rebels," which would be problematic for those without that edition.

The "Stonewall Jackson's Way" portion contains 7 scenarios and 2 campaigns.  This is two more scenarios than were included in the original.  The new scenarios are all rebalanced and Jackson is now leadership 4 as per the standard rules, down from his superman 5.  Mike L. plans on playing these all out with me over the next month so I'll report on the individual games.  All in all a worthy successor to the original.  Now, when can we expect Atlanta.....

Sunday, July 22, 2012

On To Richmond: Seven Pines

The scenario for this week's foray into 1862 returns to a more historical situation with General Johnston's attack on Seven Pines.  This is a small 2 turn tournament scenario which requires the South to attack east out of Richmond toward the better part of two Union Corps and pick up points by occupying Seven Pines, Fair Oaks and Savage's Station, and the bridge crossings over the Chickahominy.  Again I take the North and Mike L. the South. 
Dawn of May 31, 1862: Battle of Seven Pines
Turn 1: May 31, 1862
The day opens with rain as mandated by the scenario rules.  DH Hill moves up and attacks the Union positions around Seven Pines without breaking the line.  The Union reinforcements manage to cross the bridges of the swollen Chickahominy and stabilize the front.  Longstreet moves up and manages to push Casey back, but the Union army ends the day with a solid defense along the Seven Pines/Fair Oaks line.
Dawn of June 1, 1862

Turn 2: June 1, 1862
The South begins with attacks along the Union line.  Mike's corps assault and grand assault rolls fail to bring in the needed number of divisions to gain a decisive coordinated attack.  DH Hill and Smith exhaust their units attempting to breech the Union defenses.  In shame, Gen. Johnston throws himself under a Union wagon train.  That leaves "Old Pete" Longstreet, with his last intact Southern formation, to lead the army to victory.  Longstreet points his sword at Seven Pines and says "Roll a 6" and bang...the dreaded 6-1 dice combo slams into the Union III Corps.  "Do it again" says Longstreet of Fair Oaks Station and the Union line melts away.  The North reforms on Savage's Station, this single hex holding the victory points that will spell victory or defeat.  Longstreet is up to the challange and crashes into the considerable Nothern defenses.  Savage's Station falls and Longstreet has saved the day with a Confederate Marginal Victory. 
Night of June 1, 1862: Longstreet holds the field at Savage's Station

Monday, July 9, 2012

On To Richmond: The Gates Of Richmond

The 1862 campaign continued over several sessions during the month of June.  This time we went with the larger seven turn Gates Of Richmond scenario; once again settling into our now familiar roles with Mike L. taking the South and I the North.  This scenario is one of the most intriguing of the game, offering the central hypothetical of the entire campaign: what if McDowell had been allowed to march to Richmond and reinforce McClellan's army.  The system showcases the less unified early war command structures of both sides with typical corps formations containing no more than 2 divisions.  This makes for a very compelling chess-like game with small scale unit activations switching back and forth as each side attempts to gain advantage.
Gates Of Richmond Setup - Morning May 26, 1862
The situation opens with the Army of Potomac straddling the Chickahominy River ready to advance on several different avenues of attack.  The North is awarded points for occupying various important terrain features in the region: railway stations heading NW toward the Shenandoah valley, the defensive redoubt system surrounding the city, the forts guarding the southern approaches along the York River, and finally the city of Richmond itself.  The Confederates earn points, naturally, by preventing this occupation, but also by denying the Union access to its supply line along the railroad back to White House Station on the Pamunkey River. 
Night of May 27, 1862

Turns 1 and 2: May 26-27
I opted to try for a move on Richmond by crossing the Chickahominy north and wheeling around to approach the city from northwest.  This would put me closer to McDowell's marching forces and put me in a postion to push into the unoccupied redoubts in this sector of the Southern defense.  However, this strategy would come at the cost of uncovering my supply line to White House Station.  I was willing to take the risk and see how much strength Mike was willing to commit to take the rail line.  The first day the forces started slowly turning toward the western side of the city.  Day 2 saw rain which slowed everyone to a crawl as the units kept moving in the direction of the plan.  By the end of the day the North had everyone on the North bank of the Chickahominy and the South sent a force toward the supply line.  In the west, the Northern cavalry was able to push into the redoubt line before the South could adequately react. 

Night of May 30, 1862

Turns 3-5: May 28-30
The morning of May 28 found the Union army ready for action as they won a series of activations that marched the balance of two Corps into the western portion of the city itself and crossing over the river into Manchester.  The South positioned to counter-attack the next day.  May 29 was rain again which slowed all operations on both sides.  On May 30 the South launched their attacks which forced back the North from several hexes of the city and out of Manchester, but they could not move the units dug in around the President's House and Hollywood Cemetary.  Longstreet sent a division up the Union supply line which threatened White House Station.
Night of June 1, 1862: The Union holds West Richmond among the blood of Fatigue 4's

Turns 6-7: May 31-June 1, 1862
Turn 6 opened once again with rain.  Along the northern approaches, McDowell and AP Hill slowly made their way to the city battle, but effectively rendered each other hors de combat with their own battles NW of the city.  In the east, Longstreet's division took White House Station.  In response, Sumner sent a division to retake the supply line.  Turn 7 opened with renewed assaults by the South to dislodge the North from Richmond.  After several massive assaults they managed to push Franklin from the President's House, but at a considerable body count.  McClellan managed to hold onto the Public Square and Hollywood Cemetary.  At this point the game came down to who would control White House Station on the Union Supply Line.  Could Longstreet hold against Sumner's race to the river?  The point spread was so narrow that the outcome of this attack would declare the victor.  The final odds for the attack were close so we rolled the dice and the devastating 6 and 1 die roll combination came up in the North's favor!  A win for the North. 


Thursday, June 7, 2012

On To Richmond: Johnston's Retreat

The next scenario in our continuing series from the 1862 campaign is Johnston's Retreat.  Mike L. took the part of Gen. Johnston, while I put on my McClellan hat.  Here the Confederate army is attempting to slip out of the Warwick River defense line and retreat west to a consolidated line closer to Richmond.  The South gains points for each infantry, artillery and supply wagon train unit that marches to the designated western counties.  The North is charged with slowing down the retreat and inflicting damage on the slow moving wagon trains.  To aid in this task the Union is given a limited amphibious movement capability that will let them slip infantry units behind the Southern retreat path along the York River. 
Setup: Morning of May 4, 1862
Day 1: May 4, 1862
The day opens with the Confederate army already marching west, leaving Stuart's cavalry to screen the Warwick River line.  The morning opens with rain, slowing down operations on both sides.  Mike pushes his army as hard has he can to put some distance between us.  I march into the redoubts of the Warwick line and Stuart's cav manages to slow us down and fall back.  The rain reduces our movement to a crawl as we do a broad front push up the peninsula.  The navy fails to pick up any Union infantry.

Morning of May 5, 1862
Day 2: May 5, 1862
The weather clears up and the Southern commander takes up a position along the Cub Dam Creek redoubt line.  I follow up with a central pinning force and a Corps threatening each flank of the Confederate position.  One Union division under Franklin is transported up the York River and drops off in the area of Eltham Landing.  Mike breaks off a few divisons and races them NW to protect the rear lines and the wagon trains.

Morning of May 6, 1862
Day 3: May 6, 1862
Rain once again slows down operations in the field.  The Union northern flanking force manages to slip around the redoubt line but fails to make any significant headway.   The southern flanking force is slowed by the rain and Longstreet's timely counterattacks.  The navy fails to transport any new troops to reinforce Franklin's force and is bottled up by Hood. 

Morning of May 7, 1862
  Day 4: May 7, 1862
The rain stops and the Union renews its attacks along the Cub Dam line.  Several assaults manage to take the line with heavy losses on both sides but fail to slow the Confederate retreat.  The majority of southern units manage to pull back closer to the objective counties to the west.  One more division under Sykes does manage to get transported to the area of Bailey's Landing.

Morning of May 8, 1862
Day 5: May 8, 1862
The final day of operations find the Confederates poised to march most of their units into the victory objectives.  All looks lost for the Union cause as the South wins several activations allowing for a complete retreat to New Kent County.  However, Sykes manages to get two activations that allow him to slip past the Confederate pickets and raid the wagon train line, inflicting serious damage.  Sykes actions save the day for the Union resulting in a Marginal Union Victory.

Night of May 8, 1862


Friday, May 11, 2012

On To Richmond: The Warwick Line


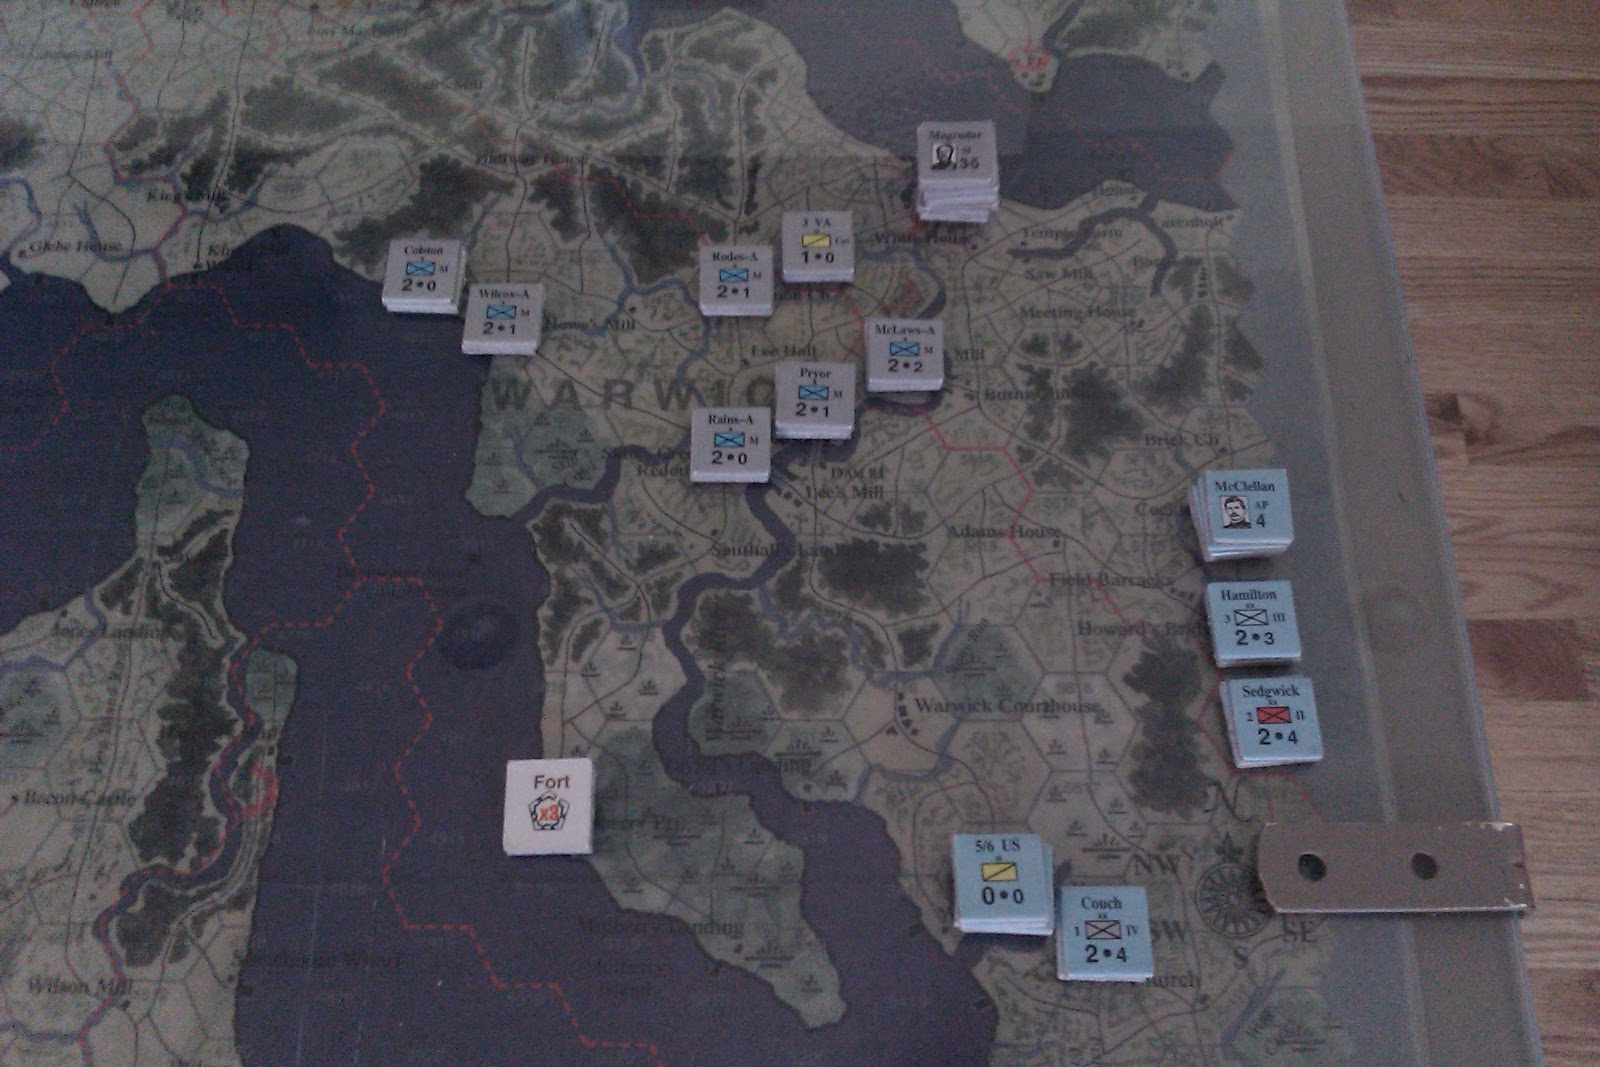
Today marked the beginning of our official 1862 campaign season commemorating the 150th anniversary of the American Civil War.  Mike L. and myself are planning on working our way through On to Richmond and Stonewall in the Valley over the next few months.   We started right at the beginning of On To Richmond with Scenario 1: The Warwick Line.  This scenario supposes that McClellan acted against form and pushed hard against Magruder's river defense line far down the Peninsula in early April 1862.  The Union is given 3 days of clear weather to break into the Confederate lines and clear out the various forts and redoubts.  We selected sides randomly and I drew the South.
Opening Positions

Mike opened on the first day by pushing toward White House and breaking into the redoubt line around the Wynn's Mill location.  Limited Confederate counterattacks managed to prevent any further attacks along the line.  Day two saw the North push farther south down the redoubt line but were held up at Monson House and were blocked from any moves west by growing Southern reinforcements.  Day 3 saw the north clear the redoubt line all the way to Skill's Creek to the south but without strength to push on to Mulberry Pt.  The balance of the Union army concentrated on Yorktown but were thwarted by Magruder's stalwart defenders, winning a combination of five separate Union assaults.  While the Union army did manage to clear the redoubt line, they took far too many casualties, nearly a 3:1 ratio, which resulted in a Decisive Victory for the South.
Final Positions

Wednesday, April 18, 2012

GCACW at Games Plus

Tuesday night was the second meeting mith Mike L. to continue our foray into the GCACW at Games Plus.  We decided once again to go with some extremely low unit count introductory scenarios so that we could play out a few different situations. 

The first action we went with was the Bath Scenario for Stonewall in the Valley available from the GCACW website.  We picked random sides and I drew the hapless USA forces.  Jackson's 5 rating attacks, even with disorganized and exhausted troops, cleaned up against the average rating of 1 for most Union units.  We did forget to use the new standard rule that reduces Jackson to a 4, but the results were never so narrow that they would have altered the outcome. 

The second scenario was New Market, also taken from the GCACW website for Stonewall in the Valley.  Here I took the South and was tasked with pushing the Union back during one rain turn.  My initial attacks bogged down in the mud and I was never able to catch up.  The turn, and game, ended quickly, once my limited number of units fatigued out. 

For the third engagement we went with the Brandy Station scenario from Stonewall's Last Battle.  Here Mike took the Union and was charged with following Pleasonton's historical plan as per scenario rules to cross at two widely seperated fords.  With luck the Union has a chance to overrun the Confederate cavalry artillery park thereby eliminating the artillery factor from the Southern units for the balance of the game.  The Northern horse broke through the ford but could not quite charge the camp.  Stuart was able to disperse the guns and managed to oppose the additional Union crossings for the win.  Another very enjoyable evening campaigning in the American Civil War.


Thursday, April 12, 2012

Great Campaigns of the American Civil War

The Great Campaigns of the American Civil War (GCACW) series remains, after ASL, my most often played collection of games.  Since the publication of Stonewall Jackson's Way in 1992 I have remained a devoted follower of Joe Balkoski's inspired operational system.  In the years that have followed, Ed Beach has continuted to develop and refine the project.  In my opinion, there is no better duo than Joe and Ed when it comes to writing concise and understandable rules.  They have proven time and again their individual technical skills by writing some of the most accessible rules of modern wargaming.  Balkoski's inception for the system came about with his 1988 release Lee vs. Grant, which created a blueprint for the command and control model that would be the centerpiece of the series, albeit at a slightly higer unit scale.  Since that time, the system has grown to include almost every major campaign in the Eastern theater and has recently moved out West with the release of Battle Above the Clouds. 

The great enjoyment of the game, as is often said of ASL, is that it creates such memorable narratives in the course of play.  Playing ASL creates a narrative that resonates with people's experience at reading, hearing and watching World War II small unit war stories.  In a similar vein, the GCACW builds an operational narrative that replicates the tensions of Civil War command as we encouter them in army and unit histories from the period.  In spite of being an operational level game, the system smartly relegates logistical concerns to simple procedures and instead places the emphasis squarely on that part of the ACW that we most often consider: the performance of individual corps and army commanders.  As anyone who has ever participated in a discussion of Civil War leaders knows, much blood and ink is spilled by devotees and detractors of the various personalities from the age.  The game system expertly generates these same command controversies by placing the player largely in the role of the army commander.  You too will be elated by Stonewall Jackson pulling off a lengthy flank march or exasperated by Burnside marching all of four miles in one day.  The impuse initiative die roll and variable movement rate subsystems elegantly recreate the tensions found at the army command level of the ACW.  It remains to this day my favorite treatment of the ACW. 

Beginning this week, fellow PAASLite Mike L. has expressed an interest in learning the game and we plan on holding weekly sessions at Games Plus in Mount Prospect, Il.  This week was our first session where we did two quick introductory scenarios: The Race For Spotsylvania from Grant Takes Command and Salem's Church from Stonewall's Last Battle.  My plan is to offer session reports on our weekly confrontations starting soon.